Adding Rules Manually in the Rule Manager
The Rule Manager allows you not only to inspect, manipulate and optimize a set of rules created with the LLM tasks, but also to manually add heuristic rules, by simply linking it to a Data Manager.
Heuristic rules are important when you need to manually add simple and generic rules: this makes the complete rule analysis process easy and customizable.
The Rule Manager task is divided into two main tabs:
In the Rules tab, you can visualize the rules, add new ones and sort or filter them.
In the History tab, you can visualize all the operations performed and cancel them.
Prerequisites
you must have created a flow;
the required datasets must have been imported into the flow;
a task has generated a ruleset in the flow.
Procedure
This procedure can be followed also if you already have some output rules coming from another task.
After having selected the output attribute in a Data Manager task, drag the Rule Manager task onto the stage.
Link it to a Data Manager.
Double click the Rule Manager task.
Right click on the white space at the left of the #Cond area.
Click on Create Rule. A window opens.
Choose the output attribute by clicking on the Order by drop down list. It must have been defined in the Data Manager. If multiple attributes have been defined, you can sort them by:
Attribute: the attributes' names are sorted as they appear on the original dataset.
Name: all the attributes' names will be sorted in alphabetical or crescent order.
Type: attributes will be sorted following their type’s alphabetical order.
Ignored: attributes are sorted with ignored attributes on top of the list.
Role: attributes will be sorted according to their role within the dataset.
Click Next to go to the Output value section.
Select the output of the rule you are creating, then click Save.
Right click onto the rule number, which is identified with the row number, and click Append condition to open the conditions dialog window.
Choose the attribute on which you want to create the condition and click Next.
Select the attribute’s value, then click Save.
Repeat the operation for each condition.
Save and compute the task.
Results spreadsheets
Rules spreadsheet |
The Rule spreadsheet, with the generated ruleset, contains the following columns:
In this spreadsheet you can modify rules and conditions:
|
Covering spreadsheet |
The Covering spreadsheet, with additional information related to the covering of each rule in the following columns:
|
Error spreadsheet |
The Error spreadsheet, with additional information about the error scored by each rule in the following columns:
|
Example
The following example uses the Go to work business rules dataset.
Description | Screenshot |
|---|---|
Import the dataset through an Import from Excel File task, then drag a Data Manager and define the Transport attribute as Output by right clicking on the attribute in the attributes list and choosing Edit in the drop down menu. Then, open the Role drop down list and select Output. Click Apply. Save and compute the task. | 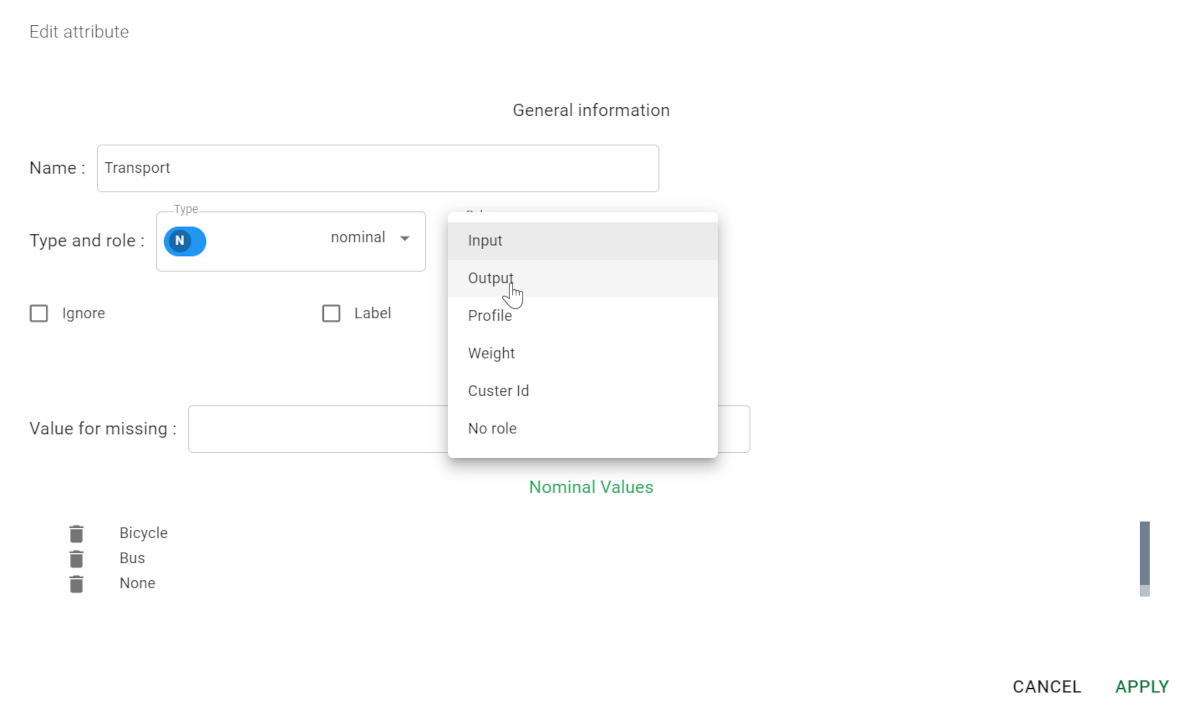 |
Add a Rule Manager task and link it to the Data Manager. Open it and in the spreadsheets section, right click on the blank space next to the #Cond column. Then, click on Create rule. | 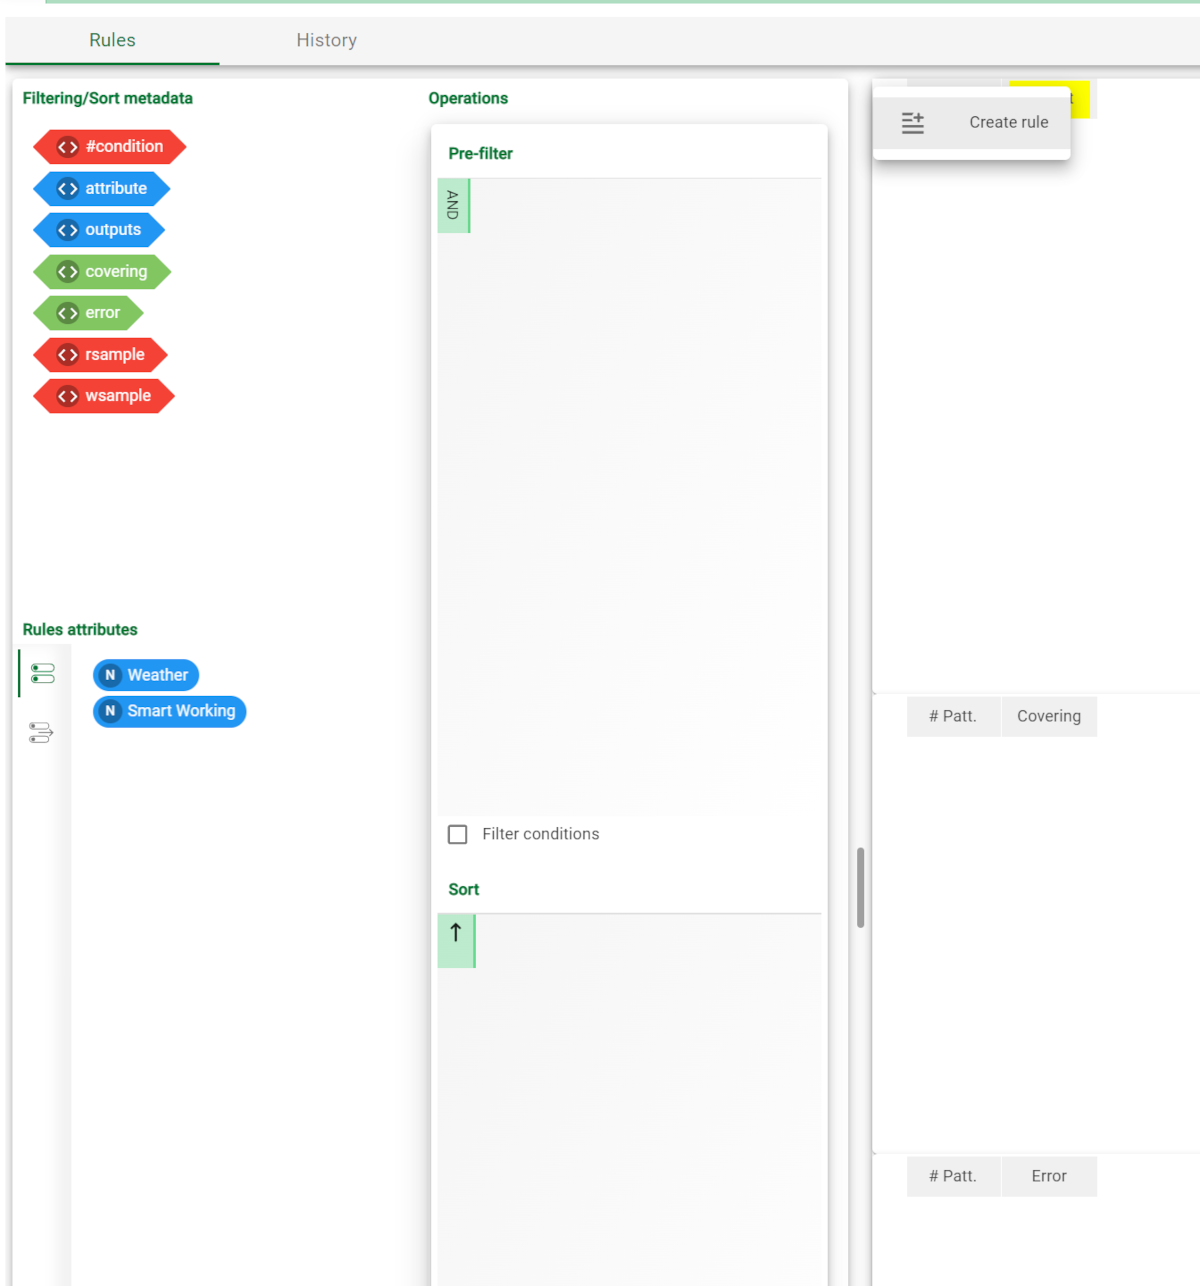 |
Select Transport as Output attribute, then click Next. | 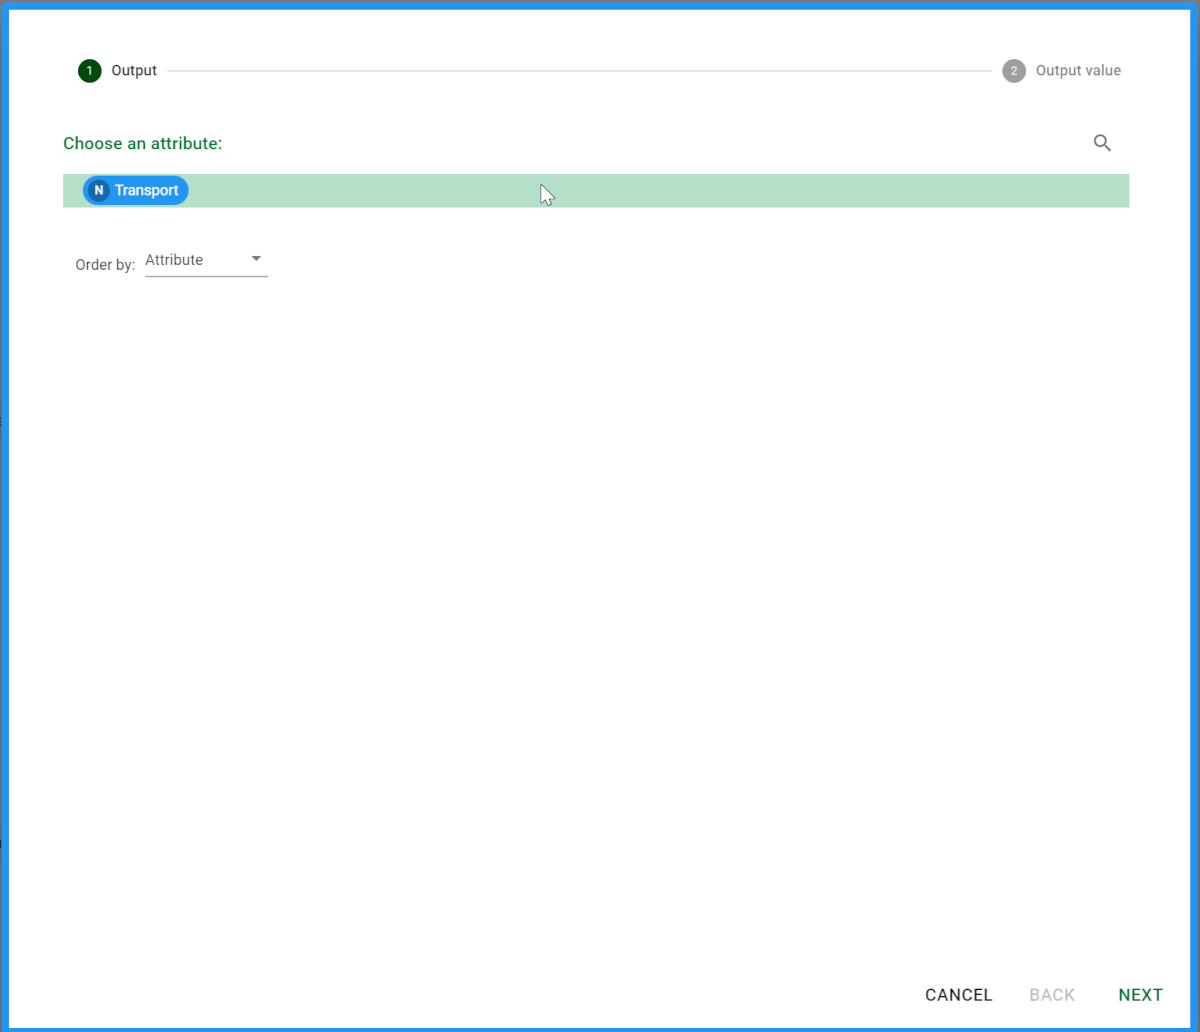 |
n this example we want to add three rules, stating that:
Let’s start by adding the first rule, so select Bicycle as the output value and click Save. The rule has been added onto the Rules tab. | 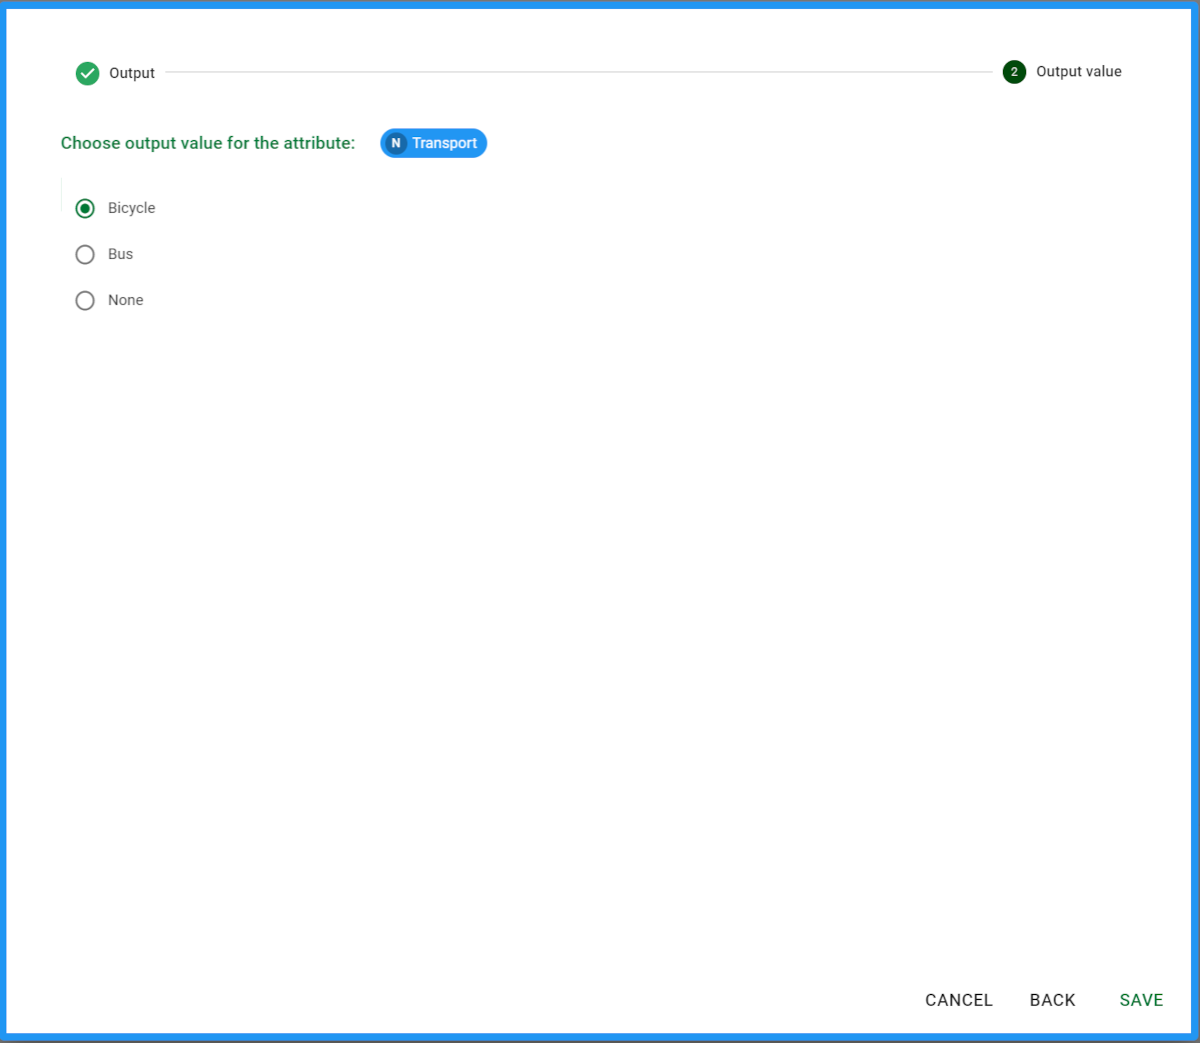 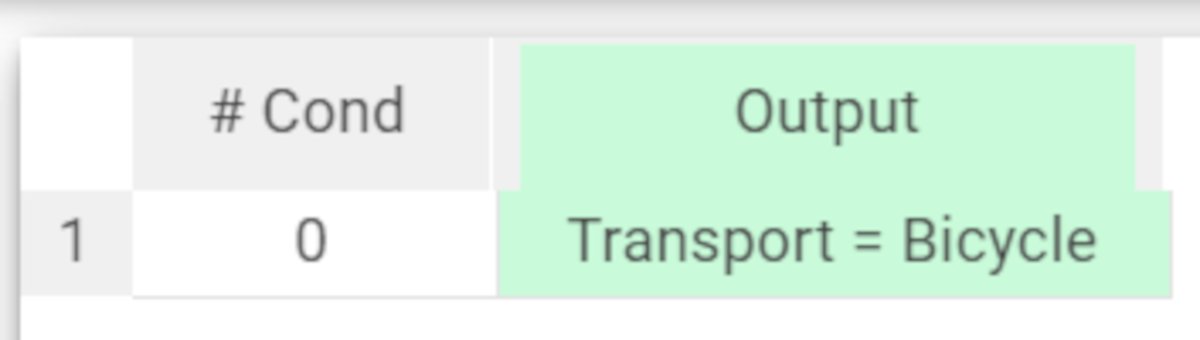 |
As this rule has only an Output, we need to add its conditions. Right click onto the rule number (which is identified by the row number) and click on Append condition: in the Attribute section, select Weather, then click Next. | 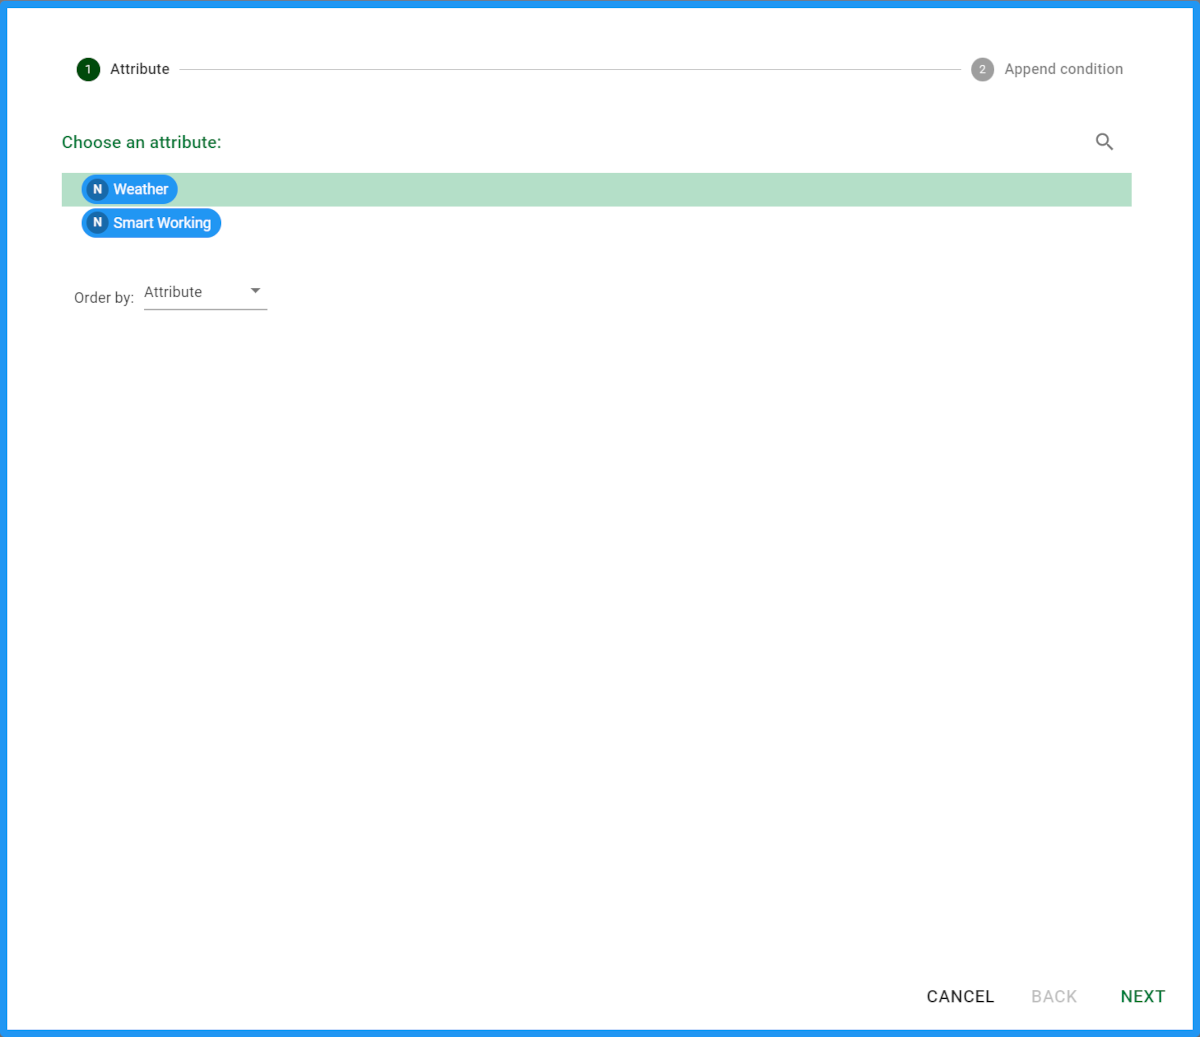 |
Select the Sunny value in the Append condition section, then click on Save to add the condition to the rule. | 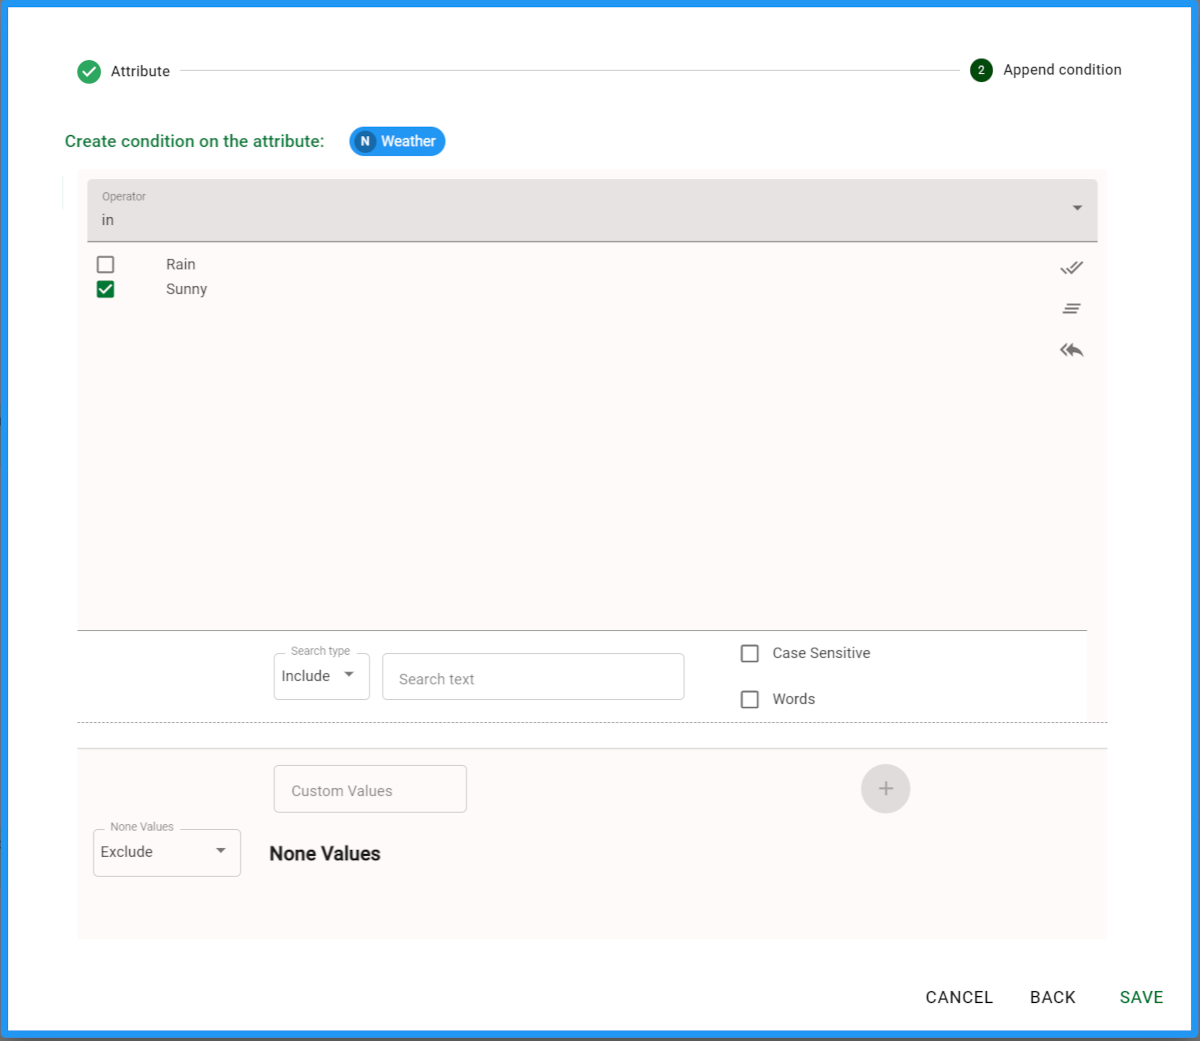 |
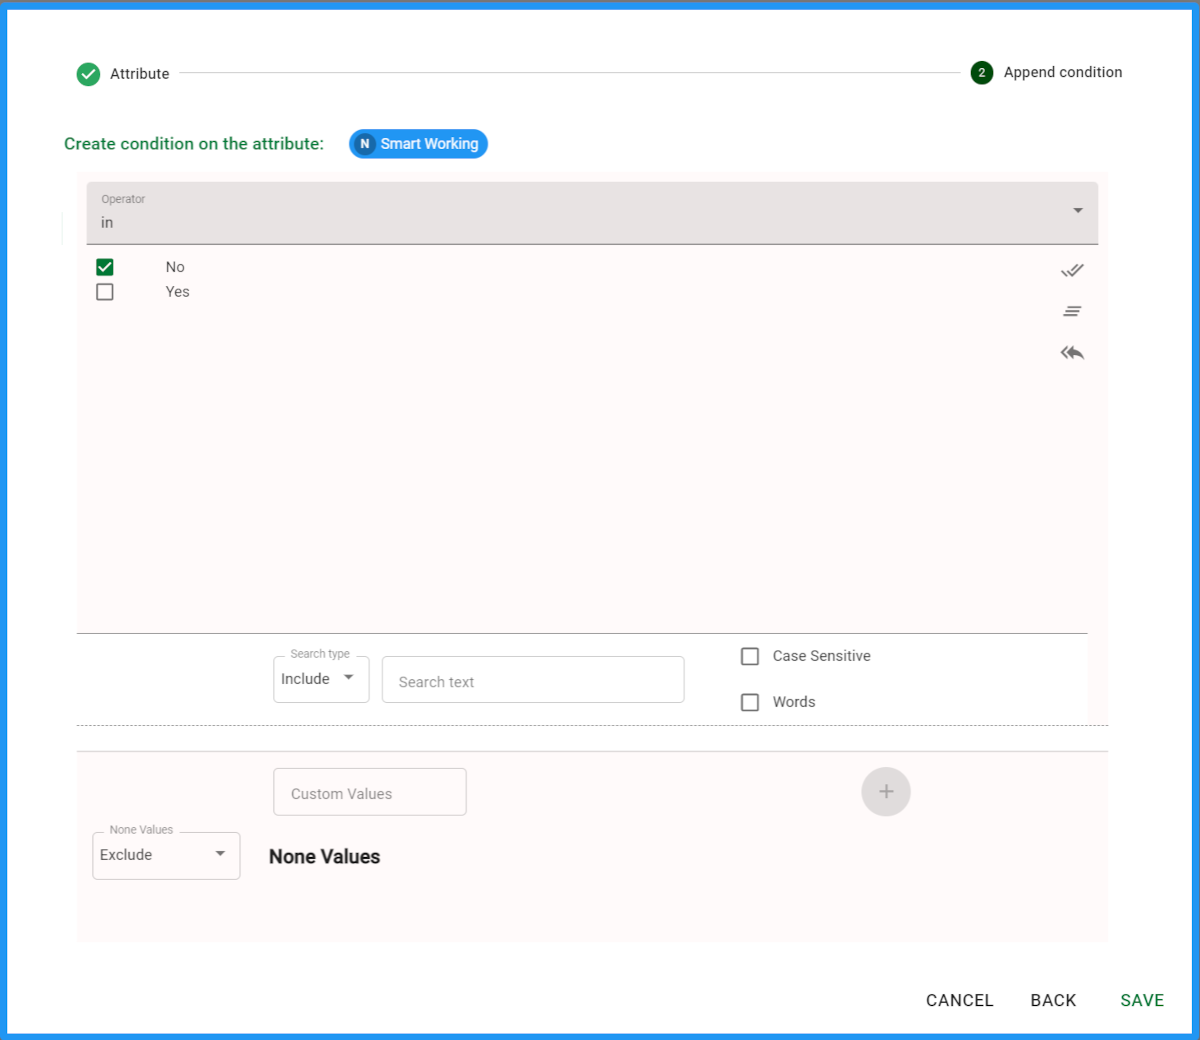
Repeat the same steps mentioned above and select Smart Working in the Attribute section. Then, select No as the value in the Append Condition section. Then, click Save. | 
|
The first rule has been created. It must be read as follows: if Weather is Sunny and Smart Working is No, then the Transport is Bicycle, meaning that if it doesn’t rain and the smart working is not allowed, the chosen transport will be the bike. Repeat the same operations mentioned above to add the other rules. Go to the Analyzing Rules in the Rule Manager page to know more on how to read the rules in the Rule Manager and to know more on the other spreadsheets and the data they contain. | 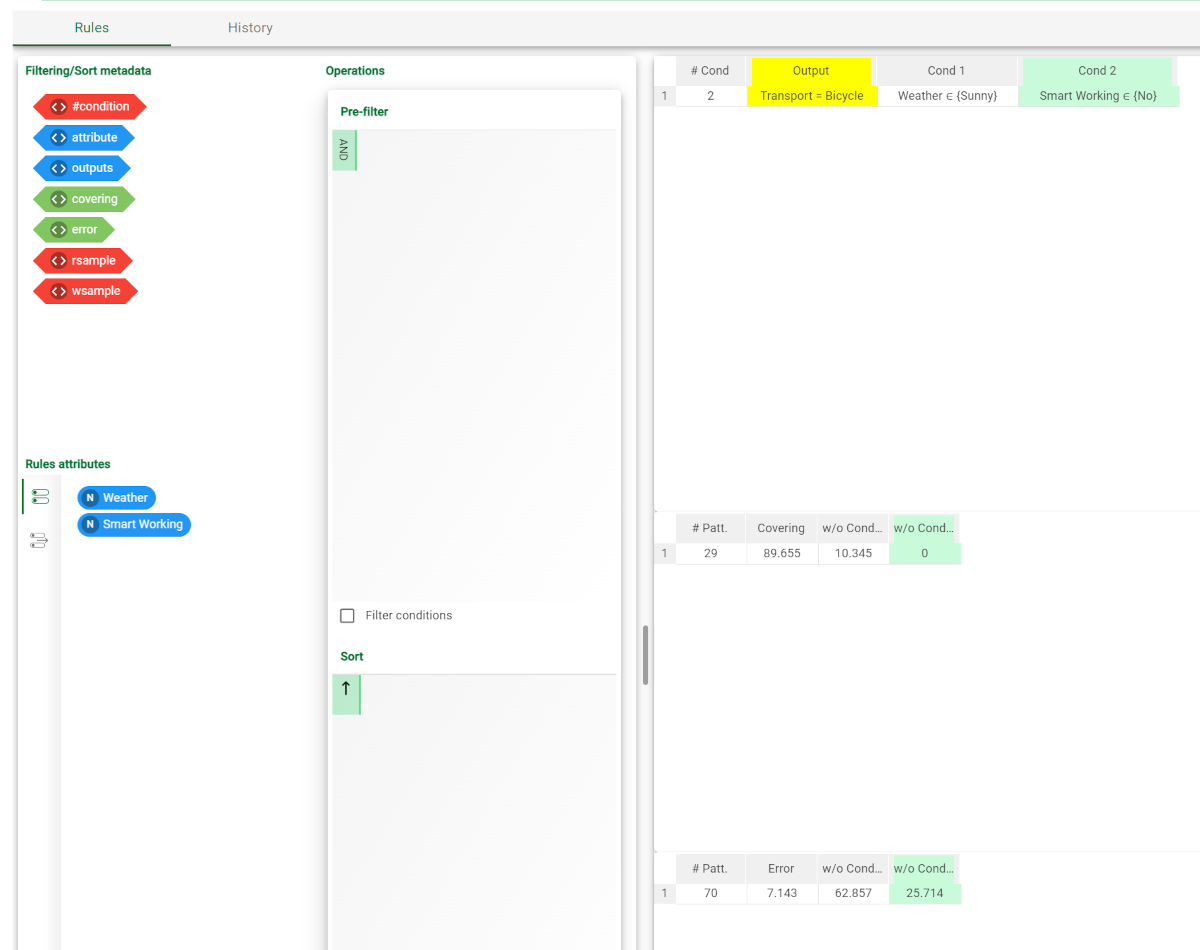 |