Exporting to an Excel File
The Export to Excel File task exports datasets or other Rulex structures to a series of Excel sheets within an Excel file.
Prerequisites
You must have created a flow;
The required datasets must have been imported into the flow.
Procedure
Drag an Export to Excel File task onto the stage.
Connect the task which contains the data to export to it.
Double click the Export to Excel File task to open it.
Configure the task options as described in the table below in the Options and File Format tabs.
Save and compute the task.
Export to Excel File options | |
Parameter Name | Description |
|---|---|
Data to be exported | Select what type data you want to export from the list of options. Possible options are:
|
Mode | Select how you want to save the file, either by storing it in a location you will then specify, by sending the file as an e-mail or both ways. If you select to send the file by e-mail, you must then specify the e-mail address in the Recipients for export via email edit box. |
Export mode | Select whether the file will be saved locally (Local File System) or remotely (Sharepoint, HDFS, AWS S3, FTP). If you chose to save the file remotely you must also configure the Remote Connection parameters in the Remote Connections tab. |
Destination | Choose the filesystem type where to store the exported file. You can choose between a Saved and Custom source. If you choose to export to a Custom source, choose the filesystem type and click on the pencil icon to fill its values, if you have chosen a remote filesystem. 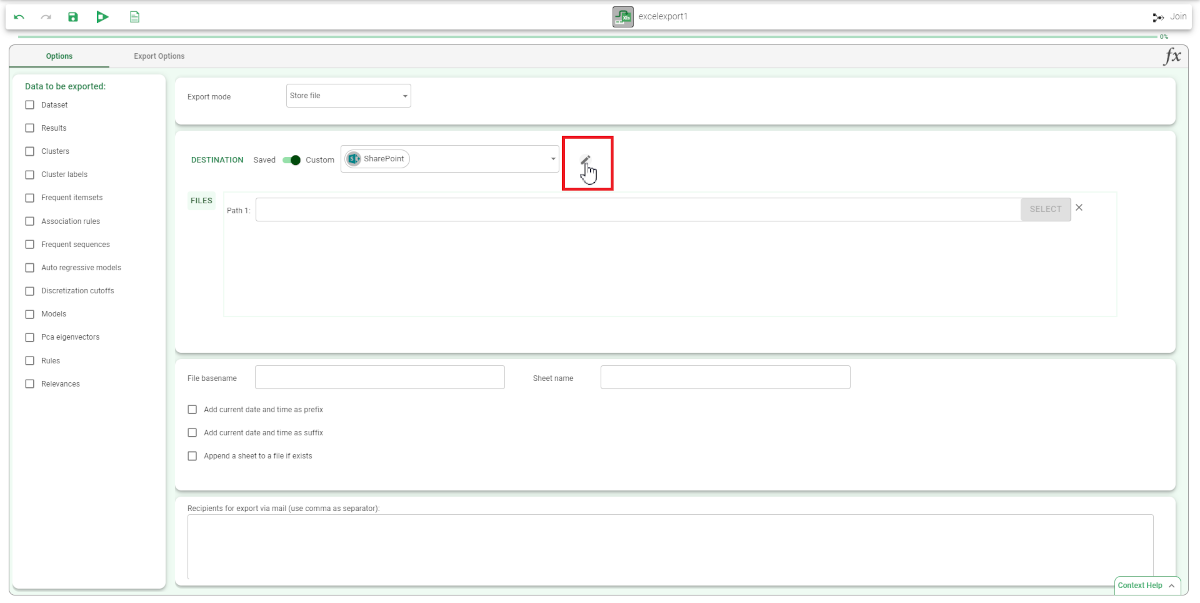 |
Files | Enter or browse to the directory where the file will be saved. |
File basename | Enter a name for the name that will be given to the exported file. If you are exporting to a Azure Storage repository you can either:
|
Sheet name | The name of the sheet where the dataset will be exported. If left blank, the default name "Dataset" will be used for the sheet. |
Append a sheet to the file, it it exists | If selected, a sheet will be appended to the file, if a file corresponding to the specified basename already exists. Be aware that if you export another dataset, with the same file basename, the same sheet name and with this option selected you will overwrite the original sheet with the new exported sheet. |
Add current date and time as prefix | If selected, the date and timestamp will be added to the start of the file basename as a prefix |
Add current date and time as suffix | If selected, the date and timestamp will be added to the end of the file basename as a suffix |
Recipients for export via email (use comma as separator) | Specify the email addresses where the exported file will be sent, separated by commas. This option will only be valid if you have selected Send via email or Both in the Mode option. |
Export to Excel File - File Format options | |
Put names in line | Choose the line where to put the attributes' names. By default, the line is line n.1. |
Put types in line | Choose the line where to put the attributes' types. By default, the line is '0', which means that no types will be included in the dataset. |
Write attribute names | If selected, the attribute names will be included in the exported excel file. |
Write attribute types | If selected, the attribute types will be included in the exported excel file. |
Write covering statistics (only for Rules) | If selected covering statistics for rules will be added to the exported excel file. |
Write error statistics (only for Rules) | If selected error statistics for rules will be added to the exported excel file. |
Write condition covering statistics (only for Rules) | If selected covering statistics for conditions will be added to the exported excel file. |
Write condition error statistics (only for Rules) | If selected error statistics for conditions will be added to the exported excel file. |
Rule format (only for Rules) | Select whether you want the rule data to be expressed as If-then, Matrix, or Multisheet. |
If you want to export to a Local Filesystem, check the dedicated Local Filesystem page.