Post-filtering Data in the Data Manager
Setting Post-filters allows you to select a subset of cases that satisfy a condition specified by the user, after you have grouped, sorted or applied a formula to them.
There are several icons displayed in the post-filter, which are useful to understand before applying filters:
The filter type icon: located at the left side of the Post-filter area, it varies according to the filter type chosen. Possible options are:
And: used in filter conditions to specify that all filter conditions must be satisfied.
Or: used in filter conditions to specify that at least one filter condition must be satisfied.
Make persistent: located on the right side of the query panel. Click on it to effectively apply all the query operations and permanently change the dataset.
Clear: located on the right side of the query panel. Click on it to clear the query table, removing all the created query operations, performed since the last time Make persistent was selected, and their effects to the dataset.
Prerequisites
You must have created a flow;
You must have linked the Data Manager to a task which contains the data to work on.
Procedure
Select whether you want to satisfy all the conditions simultaneously (and) or only one of them (or). This choice can be made also after having set the attribute’s filters by clicking on the and/or button in the Postfilter box.
Drag the attributes onto the Post-filter area.
Set your post-filter options, as described in the filter options table below.
Click Apply.
Click either:
Make persistent button to save your results and make all the query operations permanent.
The postfilter cell is automatically cleared from the query operations performed, but the query operations are still applied to the table.Clear to remove query operations from the query panel: it cancels all the query operations that haven’t yet been made persistent.
Save and compute the task.
Filter by: | Details |
|---|---|
Values | This option allows you to set conditions on the values of the selected attribute.
|
Attributes | This option allows you to filter your values based on its relationship with another attribute. You can filter values by selecting the operator you want to use to filter your data, then select the attribute from the drop-down list. For ordinal values you can also select a range by also specifying the left-hand operator. You can decide to include missing values from your condition in the None values section. By default they are excluded. |
Code | This option allows you to filter your values via a custom formula or via variables. First, you need to select the required operator to filter your data. When filtering via a formula, enter the formula and open a bracket, following the syntax below:
To specify a range of ordinal values, successively select a left-side operator and specify the required values in the same way. You can decide whether to consider the None values or not by clicking on the corresponding checkbox. To know which formulas can be used in the code filter go to the Formulas and Functions page. Remember that it is mandatory to follow the formula’s syntax (including capital letters), otherwise an error is returned. You can also use variables to filter your data, by writing a |
To view a configured filter, right-click the attribute in the post-filter area and select Open.
To disable right-click the attribute in the post-filter area and select Disable. If the filter is disabled, the attribute will result in a blurred image and the dataset won’t be filtered.
To re-enable the filter, right-click the attribute in the post-filter area and select Enable - this is useful if you want to enable only the selected querying operation.To delete a filter, right-click the attribute in the post-filter area and select Delete.
To build complex filters with the Indent Selection feature see the page Building complex pre-filters & post-filters in the Factory.
Operators available for ordered attributes
Operator | Meaning |
|---|---|
== | Equal to |
!= | Not equal to |
< | Less than |
<= | Less than or equal to |
> | Greater than |
>= | Greater than or equal to |
Example 1 - Values
The following example uses the Adult dataset.
Step | Screenshot |
|---|---|
| 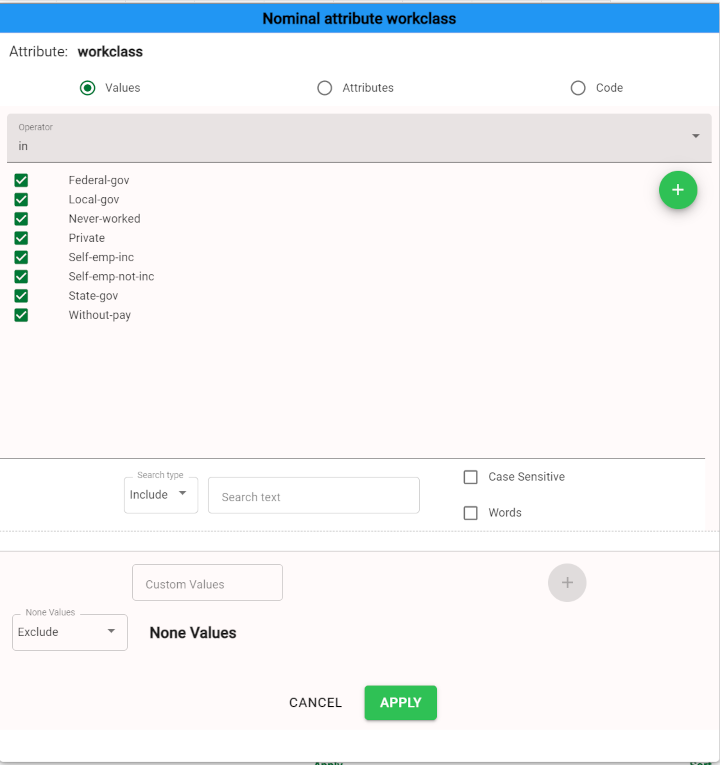 |
| 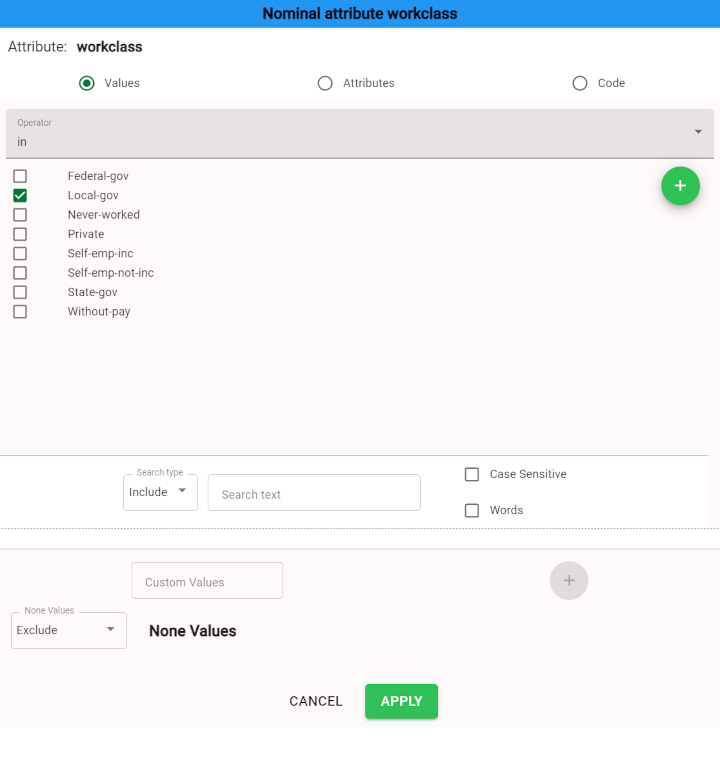 |
This is the result after you have post filtered your attribute. Only the rows regarding people belonging to the Local-gov workclass will be shown. | 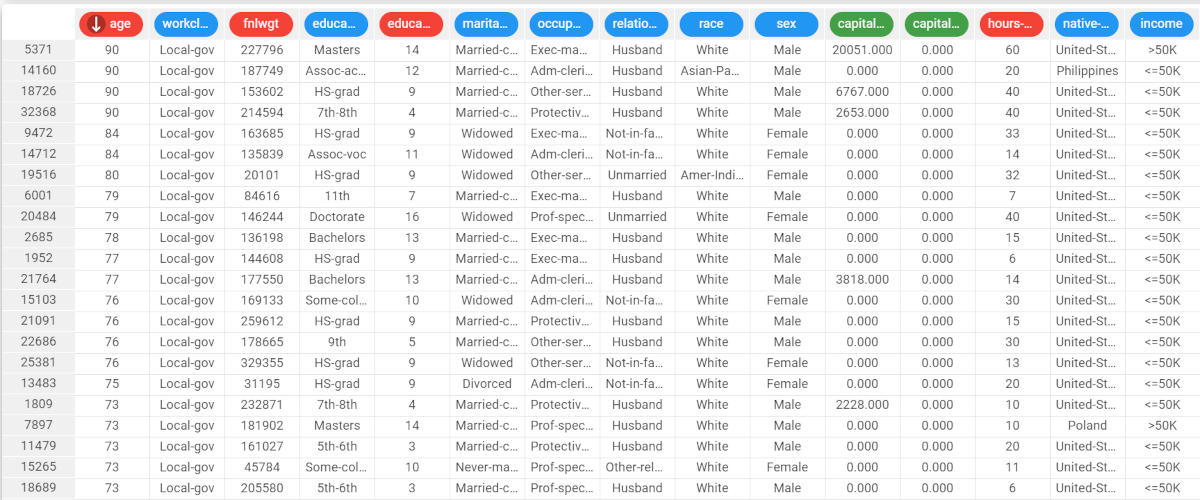 |
Example 2 - Attributes
The following example uses the Ecommerce shipping data dataset.
Step | Screenshot |
|---|---|
| 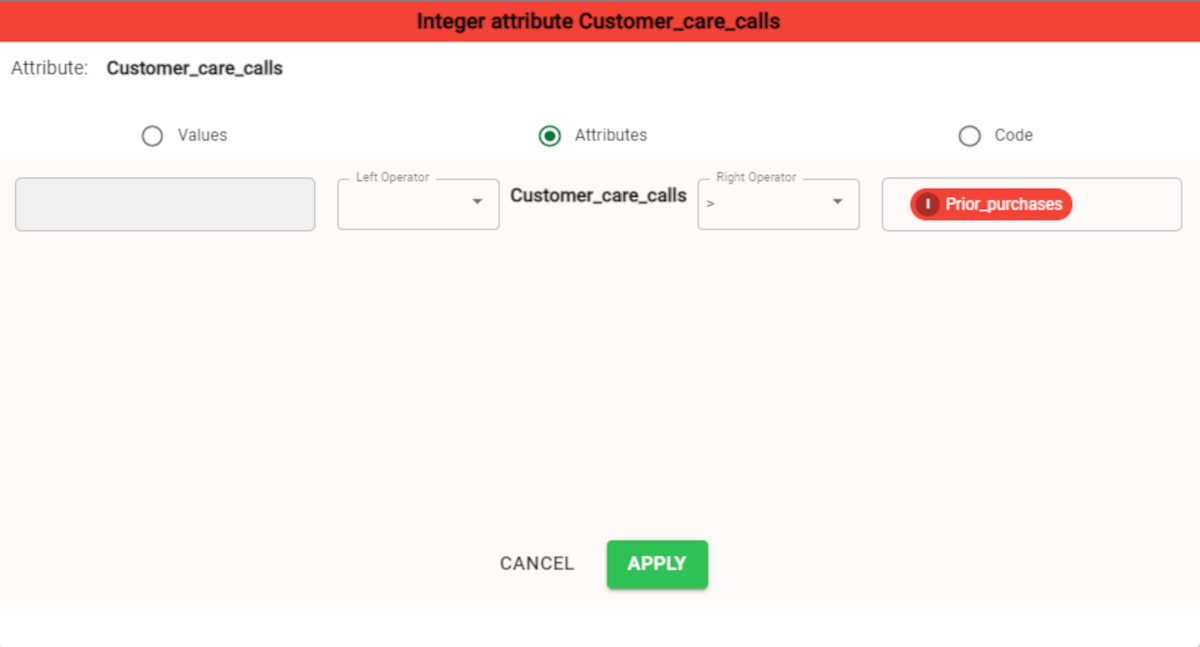 |
This is the final result after you have post-filtered the Customer_care_calls attribute. |  |
Example 3 - Code
The following example uses the Adult dataset.
Step | Screenshot |
|---|---|
| 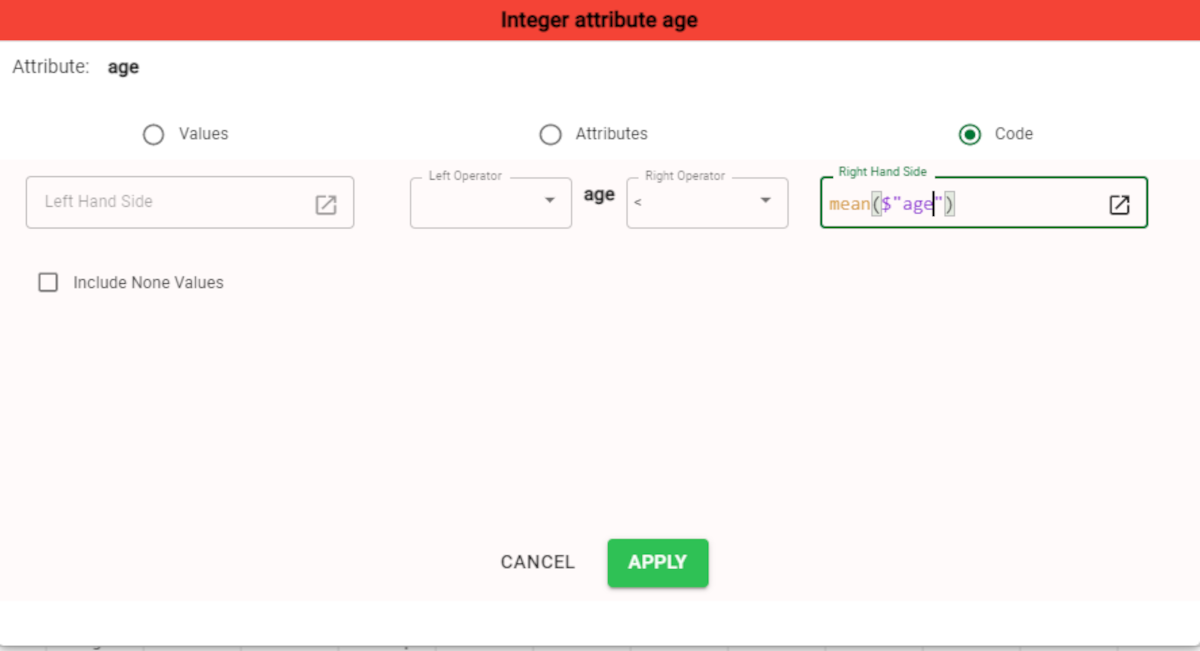 |
This is the final result after you have post filtered the age attribute. | 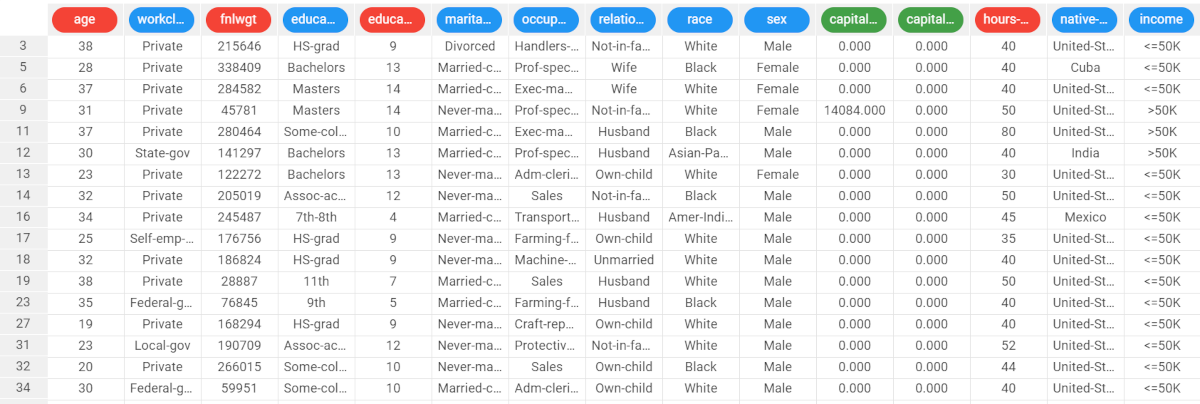 |